Simple Tips for Better Zoom Teaching
Welcome to the second week of classes! Coming up on a year of remote learning, students and professors alike are still adapting to Zoom and the online school format, with a truly staggering number of different strategies. I’ve compiled a loose list of Zoom teaching tips for professors from my personal experience as a student and the anecdotal experiences of my friends over the past year. (Disclaimer: this list is neither comprehensive nor definitive — feel free to take what you need.)
The first section of tips involves changing your Zoom settings; making these changes should take about five minutes and will improve everyone’s Zoom experience significantly.
Tech Advice
Tip 1: Enable renaming in all meetings by default. This is important for students who want to use a nickname or put pronouns in their names. Here’s how to do it:
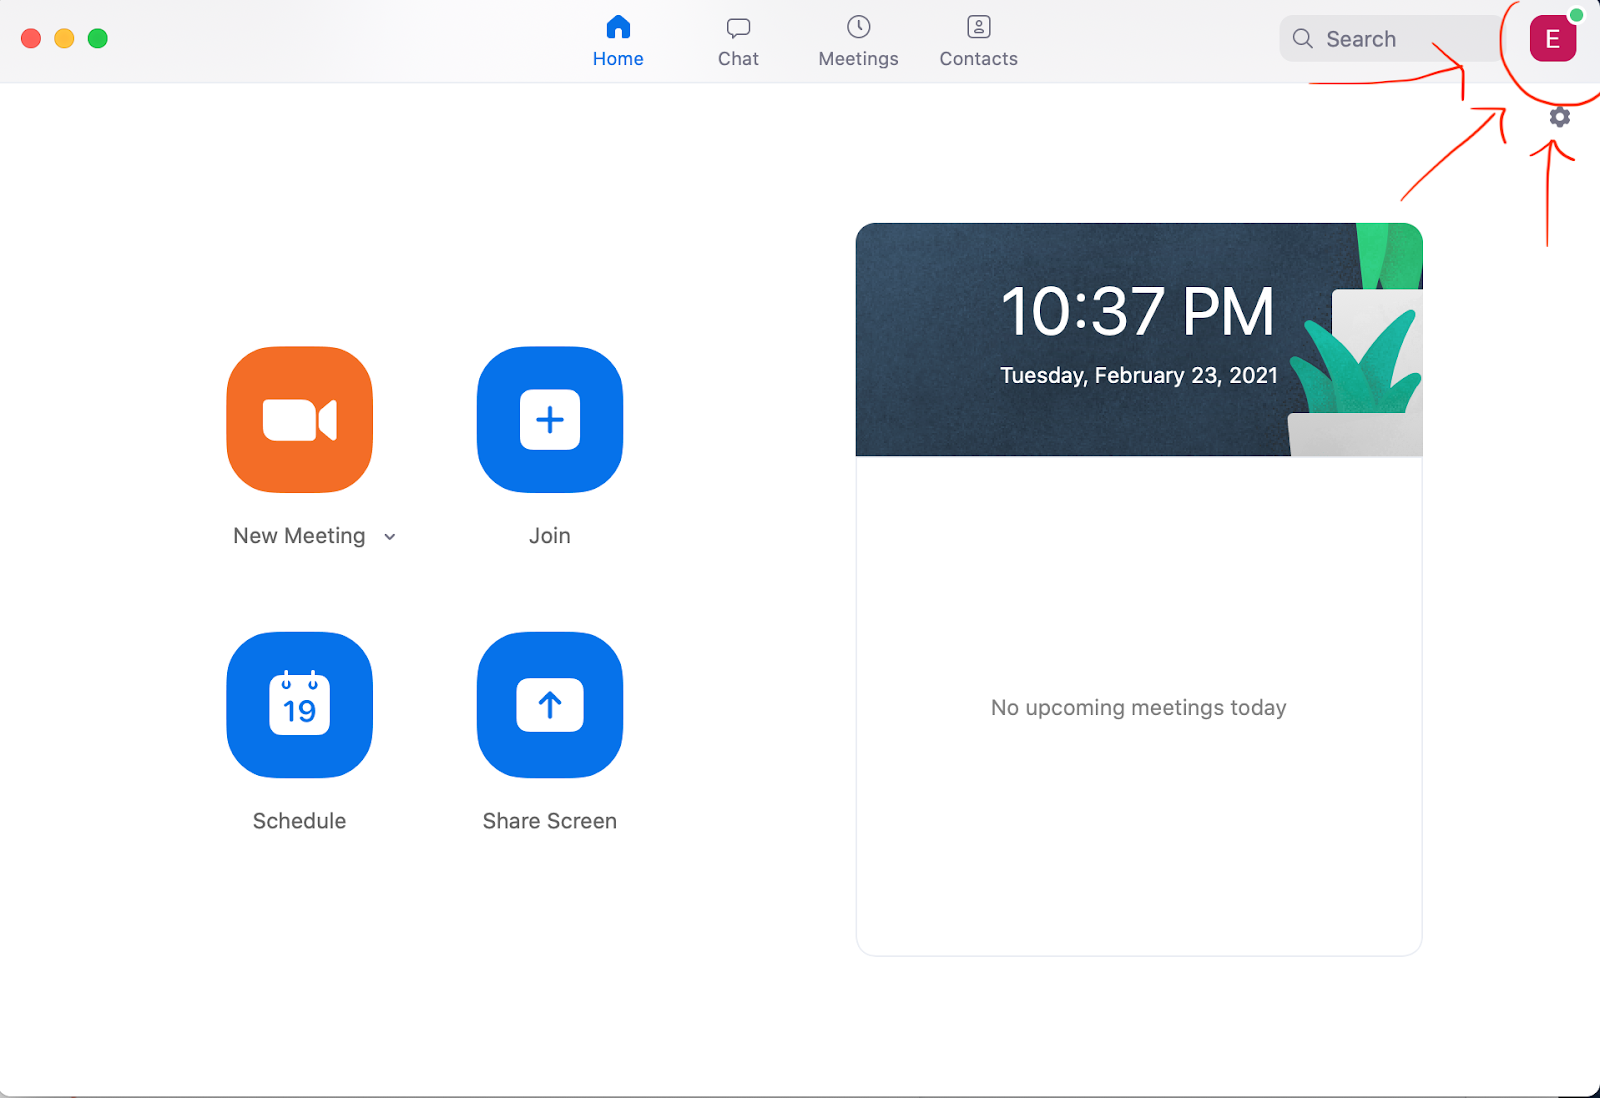
1. Open the Zoom app.
2. Click on the icon at the top right, then on “My Profile” in the drop down menu.
3. Sign in through the Amherst portal that pops up. (This will take you to the zoom.us website.)
4. Go to “Settings” in the menu on the left.
5. Under “In Meeting (Basic),” enable “ Allow participants to rename themselves.”

Tip 2: Put pronouns in your own name, e.g. Jane Doe (she/her/hers). This normalizes displaying pronouns, which makes it easier for professors and peers to learn the correct ones. It also ensures that gender non-conforming people are not singled out for making their pronouns available. (You cannot permanently change your name without talking to the IT Department, so you may need to do this manually at the start of each meeting.)
Tip 3: Allow the participants to join before the host. This way, students who come in early can interact, instead of being alone in a waiting room. In one of my smaller classes, this has come to mimic the few minutes of casual conversation on the way to and from in-person classes. To do this:
1. Go to “Settings” on the Zoom website (as described in Tip 1).
2. Under “Security,” disable the “Waiting room” option.
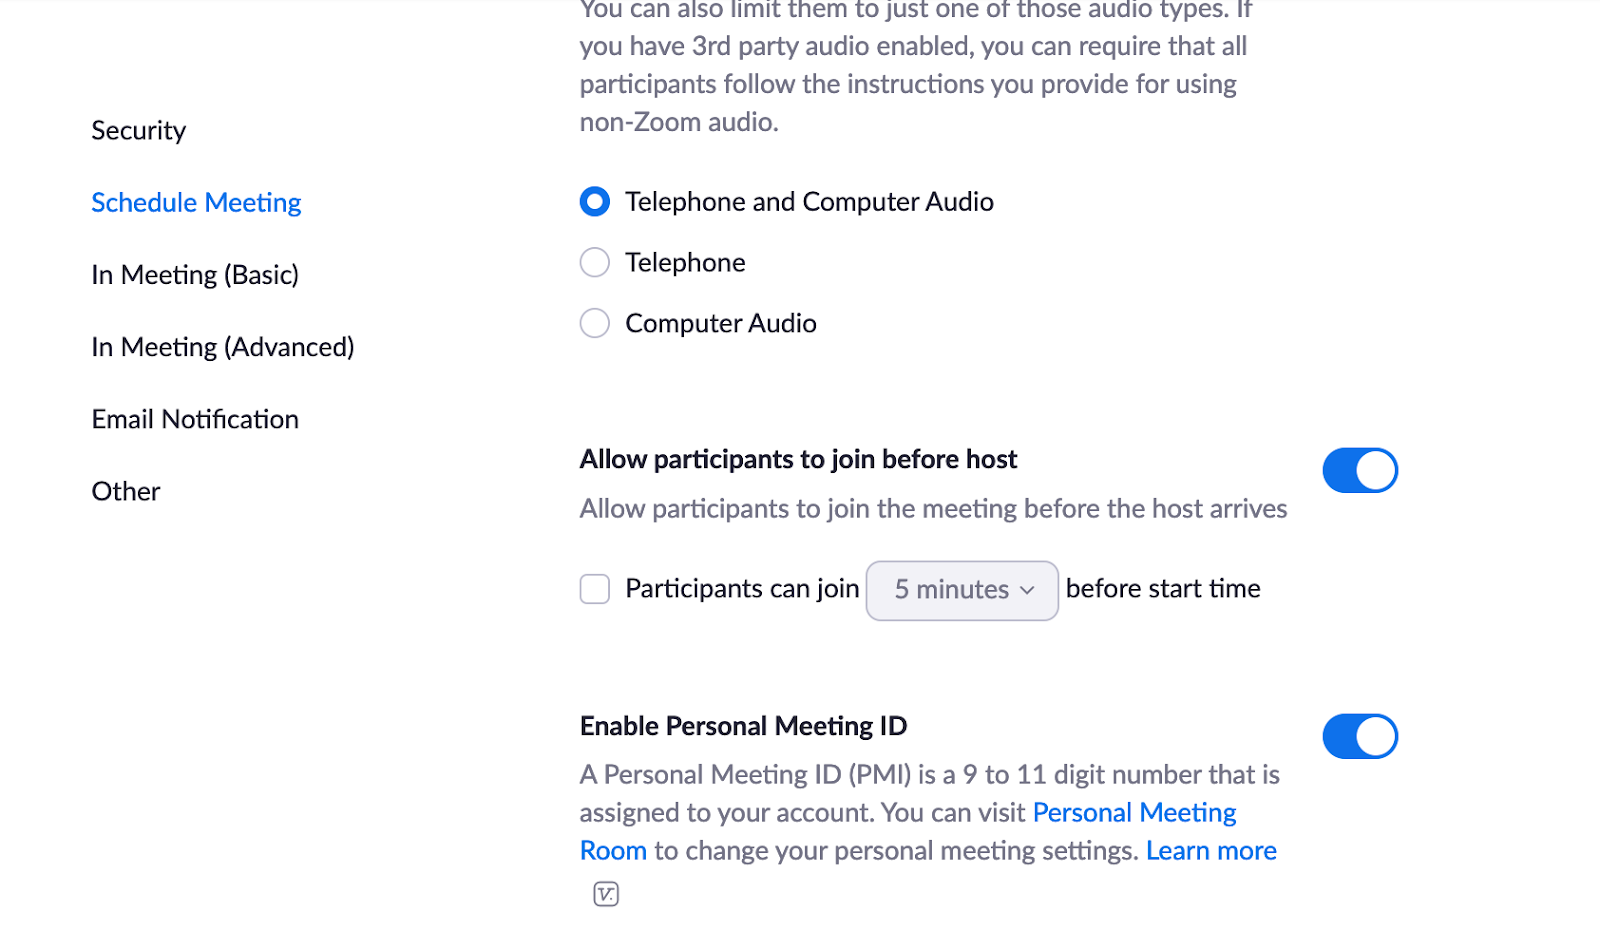
3. Under “Schedule Meeting”, enable “allow participants to join before the host.”
4. Under “Email Notification,” disable notifications for “When attendees join meeting before host.” (Remember to do this, or your email will be insufferable.)
By the way, you will still have the option to enable “waiting room” under “Security” when you schedule a meeting in the Zoom app, but this way your default option will allow interested students to meet up before class.
Tip 4: Allow individuals to private chat. While some may argue that this could be distracting, private chat shouldn’t be blamed for causing distractions since other potential sources of distractions such as email, webcomics and social media are a single click away. Rather, it allows for a bit of social interaction at the start of class, or a quick way for a student to ask a friend a clarifying question without disrupting the whole class. Here’s how to do it:
1. Go to “Settings.”
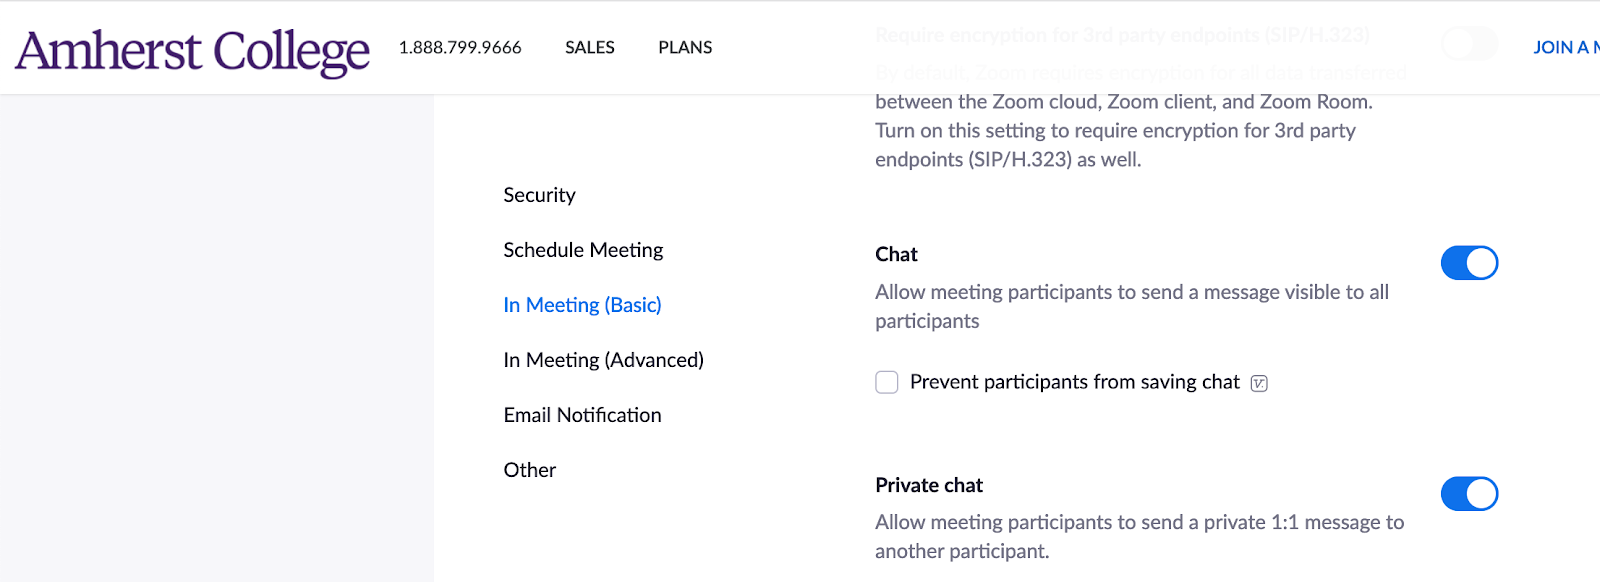
2. Under “In Meeting (Basic),” enable “Private Chat.”
Other Advice
Congratulations, that’s it for tech! Here are some additional observations about how to up your Zoom game to facilitate a good online class:
Tip 5: If you are teaching a class longer than an hour, whenever feasible please give us a three-minute break to stand up and stretch. (Infinite thanks to Professor Amalia Culiuc for doing this all last semester!)
Tip 6: If possible, hang around for a couple minutes after class ends, in case students have lingering questions. This mimics the in-person days when people would stick around in the classroom and ask questions before hurrying off to their next class.
Tip 7: Whenever possible devote some time to breakout rooms (especially if the class is large). In humanities courses these can be discussion groups; in STEM courses, worksheets. Last semester, having one class a week be a worksheet class helped me both absorb the material better and have a chance to work with new people.
Tip 8: If you show up to the Zoom room a couple minutes early and have music playing as people trickle in, it creates a nice atmosphere and avoids the awkward silences for the few minutes around the start of class. (This is especially good for a first class, a large class where people don’t know each other or a music class.)
Tip 9: Pause for questions when you can (and take a longer pause than you would in person), or to ask us a question to make sure we’re not struggling to follow along. This is simple but easy to forget when you can’t see students’ faces.
Tip 10: We like it when you make jokes, even if you don’t hear or see us react. (Well, maybe this is just me, but I like it.)
Tip 11: If you are teaching a hybrid course, for a better viewing experience than a chalkboard camera, write on a tablet that is broadcasting to Zoom, and simultaneously project those notes onto the chalkboard. Also, writing from your desk or lectern allows you to monitor the chat for questions from remote students. Finally, this gives you a nice set of easily uploadable handwritten notes at the end.
Tip 12: Before scheduling office hours, take a survey of the different time zones of students in the classroom. This will enable you to choose times when remote students can attend.
Thanks for making it to the end of this guide, and hopefully implementing some of these tips in the classroom. The Zoom learning experience might not be ideal, but simple improvements can make a big difference.
Comments ()